A bullet journal key is a simple reference system made up of symbols that help you quickly understand what each entry in your bullet journal means. Instead of writing out long explanations, you use short symbols to represent tasks, events, notes, and their status.
A key is simply a legend that translates the rapid logging symbols you use in your journal. It acts as the “decoder” for your brain, allowing you to scan a page in seconds and instantly see what is pending, what is done, and what is important.
Many people keep their bullet journal key on the first page of their journal so it’s always easy to reference.
Whether you are a minimalist sticking to the original method or an artist looking for aesthetic symbols, this guide covers everything you need to set up your key for bullet journal success.
The Original Bullet Journal Key Symbols
If you are a beginner, it is highly recommended to start with the original system created by Ryder Carroll in The Bullet Journal Method. It is designed for speed and requires no artistic ability.
The core of the system relies on three categories: Tasks, Events, and Notes.
• (The Dot): Used for a Task. This is actionable.
O (The Open Circle): Used for an Event. This is date-related (e.g., “Dentist at 3pm”).
– (The Dash): Used for a Note. Facts, ideas, or observations that don’t require action.
Managing Task Status
Once you have written down a task with a dot (•), you change the symbol to update its status:
X (X): Task Completed. You turn the dot into an X.
> (Right Arrow): Task Migrated. You didn’t do it today, so you moved it to the next monthly log or tomorrow’s daily log.
< (Left Arrow): Task Scheduled. You moved the task to the Future Log (a specific date in the future).
Strikethrough: Task Irrelevant. The task no longer matters.
Signifiers: Adding Context to Your List
While the basic symbols tell you what an item is, signifiers give that item context or emotion. You place these to the left of your bullets so they stand out in the margin.
* (Asterisk): Priority. Do this first.
! (Exclamation Point): Inspiration. A great idea or something you want to remember.
👁 (Eye): Explore. Something to research or look into later.
In addition to the above Bullet Journal symbols, you are encouraged to create your own key symbols. On the other hand, Ryder Carroll (creator of the Bullet Journal) does suggest that you don’t use too many symbols. If you have too many symbols, it might complicate the system and thus defeat the purpose.
Summary of the Key Symbols
Tasks
• = Task
X = Task Complete
> = Task Migrated
< = Task Scheduled
Events
Events – “O”
Notes
Notes – “–”
Extended Bujo Key Ideas (The Mega List)
Once you’re comfortable with the basics, many people expand their bujo key to track specific tasks, habits, and life areas. This extended bullet journal key list includes popular symbols that are easy to remember and genuinely useful.
Symbol
Name
Meaning
Best Used For
Status & Progress
◻
Box
Task
An alternative to the standard “dot” if you prefer checking off boxes.
◩
Half-Filled
In Progress
Marking a task that you have started but haven’t finished yet.
◼
Filled Box
Completed
Visual satisfaction that a task is 100% done.
~
Tilde
Cancelled
An alternative to the strikethrough for cancelled events or tasks.
⌛
Hourglass
Waiting On
A task is “done” on your end, but you are waiting for someone else to reply.
Communication
@
At Symbol
Email / Online
Correspondence tasks (e.g., “Reply to Sarah,” “Send newsletter”).
📞
Phone
Call
Scheduled phone calls or reminders to make an appointment.
💬
Speech Bubble
Meeting
Face-to-face meetings or Zoom calls.
?
Question Mark
Inquiry
Something you need to ask someone or clarify later.
Finance & Shopping
$
Dollar Sign
Expense / Bill
Marking a bill due date or a budget-related note.
🛒
Cart
Shopping / Errand
Items to buy or physical errands to run (groceries, post office).
💳
Card
Subscription
Reminder for subscription renewals or automatic payments.
Time & Planning
⏰
Clock
Deadline
A task that must be completed by a specific time today.
!
Exclamation
Priority
High-urgency items; do these first.
👁
Eye
Explore / Research
Topics you want to look up later but don’t have time for now.
✈️
Plane
Travel
Marking flight details, packing lists, or trip planning.
Personal & Health
❤
Heart
Memory
A highlight of the day, a gratitude entry, or a special moment.
🎁
Gift
Birthday
Marking birthdays in your monthly or future log.
💧
Drop
Hydration
Tracking water intake (often used in daily headers).
💊
Pill
Medication
Reminder to take vitamins or medication.
💡
Lightbulb
Idea
A stroke of inspiration or a random thought to migrate to a collection later.
Creative Bullet Journal Key Ideas & Placement
Once you have decided on your symbols, you need to decide where to put them. The location of your key is just as important as the symbols themselves; if it isn’t easy to reference, you will eventually stop using it.
There’s no rule that says your bullet journal key has to live on a single page and never move. In fact, how and where you place your key can make a big difference in how easy your journal is to use.
Here are five creative ways to set up your key, ranging from the standard approach to clever hacks that keep your symbols visible at all times.
The Index Page (Standard)
This is the most traditional method. Its the most common and beginner-friendly option. Most notebooks (like the Leuchtturm1917) come with a designated index or blank pages at the front. Drawing your key on the inside front cover or the very first page ensures it is permanent and easy to find whenever you need it.
Pros: Permanent; impossible to lose.
Cons: You have to flip back to the start of the journal every time you forget a symbol.
This option works especially well if:
You use the same symbols consistently
You don’t change your key often
You want a clean, traditional setup
The Flip-Out Key (Pro Tip)
This is widely considered the most efficient method for beginners who are constantly referencing their legend.
How to make it: Write your bullet journal key on a separate piece of thick cardstock. Use washi tape to attach one edge of the cardstock to the back cover of your notebook so it folds out.
Result: When extended, the key sits outside the notebook. This allows you to keep the key open and visible while you are writing on any page of your journal, preventing you from flipping back and forth constantly.
You can keep your key open and visible while writing on any page of your journal, without constantly flipping back and forth. It’s practical, fast, and surprisingly satisfying to use.
This is widely considered one of the most efficient bullet journal key ideas, especially if you reference your key often.
This method is ideal if:
You’re still memorizing your symbols
You use a larger or more detailed key
You want maximum efficiency while journaling
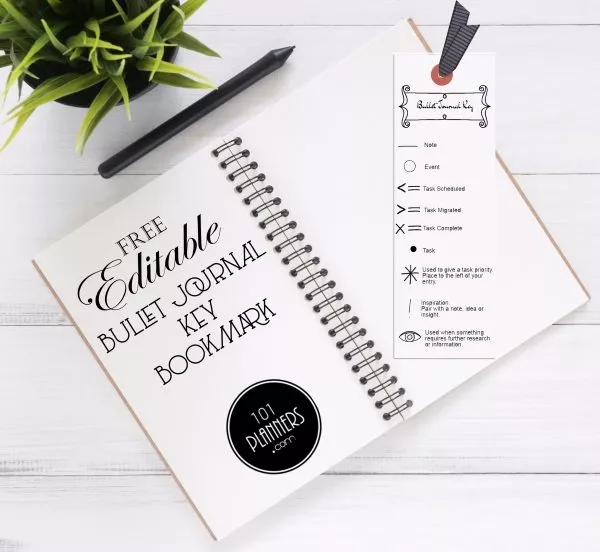
The Bullet Journal Key Bookmark
If you don’t want to tape anything to your journal, a bookmark is the perfect flexible solution. Its both functional and flexible.
How to make it: Create a custom bookmark using heavy cardstock, watercolor paper, or laminated paper. Draw your key on one side and perhaps a ruler or grid guide on the other.
Click on the image to create a printable bookmark with the bullet journal signifiers. You can edit all symbols if you want to delete any or add additional entries.
Why it works: It serves a dual purpose. It marks your current daily log so you never lose your place, and your key is always right there next to the pen.
This idea is great if:
You don’t want to dedicate a full page to your key
You use multiple notebooks
You like reusable, portable systems
The “Dutch Door” Key
This is a more advanced setup that involves cutting your pages.
How to make it: You dedicate the first page of your journal to your key, but you cut a vertical strip off the edge of all subsequent pages (about 2-3 cm).
Result: The key, written on the inside back cover or a rigid back page, remains visible on the right-hand side no matter which page you are currently working on. Note: This requires committing to cutting your entire journal.
The Laminated Dashboard
For those who move between multiple notebooks (e.g., a work journal and a personal journal), a portable dashboard is ideal.
How to make it: Design your key digitally or on paper, then laminate it.
Why it works: It is durable, spill-proof, and can be moved from one notebook to the next, meaning you only ever have to create your key once. You can tuck it into the back pocket of your journal when not in use.
Monthly Mini Key
If your symbols change depending on the month, a monthly mini key can be helpful.
Place a small bullet journal key at the start of each month that includes:
Temporary symbols
Short-term habits
Project-specific icons
This keeps your main key simple while allowing flexibility when your focus shifts.
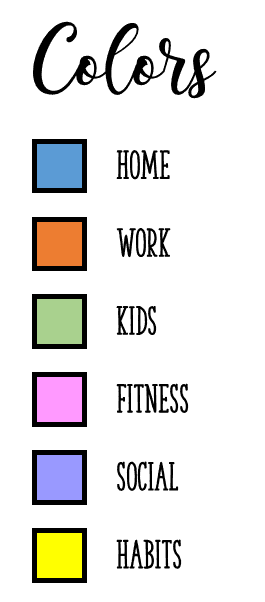
Color-Coded Key Strip
Instead of symbols alone, some people add color cues to their bullet journal key.
For example:
Blue for work tasks
Green for personal items
Red for urgent
Yellow for health
Pink for self-care
Purple for ideas or inspiration
You can place this as a slim strip along the edge of a page or as a mini key taped inside your journal.
Color Coding Your Bullet Journal
Another way to convey information really quickly is by using a color code. Assign a different color to each category or activity. Add the color code to the beginning of your journal so that you can reference it. You can also use it as a bookmark by drawing it on a strip of cardstock. Once you memorize the color code, you won’t need to reference it anymore and that will happen sooner than you think. Integrating color coding into bullet journaling can enhance both its functionality and aesthetic appeal. Here are some more ways you can use color coding in your bullet journal.
Task Categories: Assign different colors to various categories of tasks (e.g., work, personal, health) to quickly identify them. When your schedule is color-coded, you can see at a glance what activities you have without even reading. You can add the color codes to your key page as well.
Priority Levels: Use specific colors to mark high-priority tasks or deadlines. This visual cue helps you to focus on the most urgent and important tasks first.
Mood Tracking: Incorporate colors to represent different moods or energy levels in your mood tracker. This can help you visually track your emotional well-being over time.
Event Types: Differentiate between types of events (meetings, social outings, appointments) using colors. This method makes it easier to distinguish your personal, professional, and social commitments at a glance.
Free Printable Bullet Journal Key
The bookmark moves with you throughout your journal. Slide it to the page you’re working on and reference it instantly.
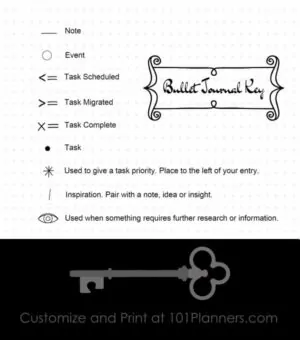
A list of the official symbols provided by Ryder Carrol on a dot grid background
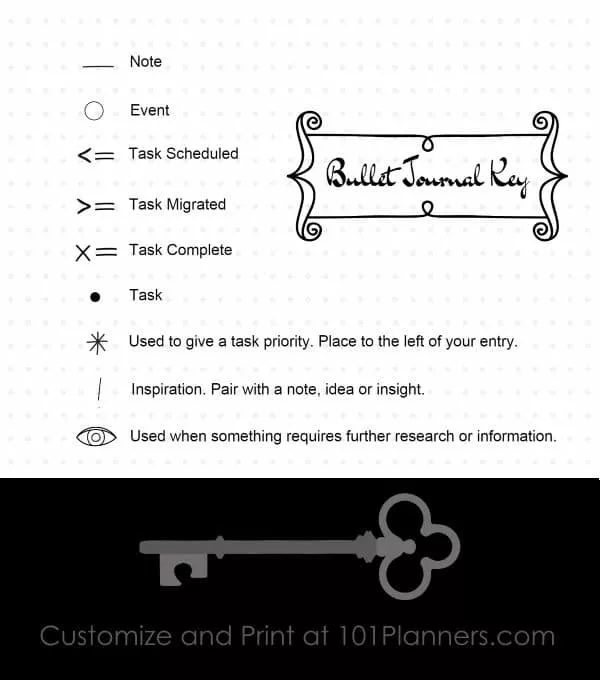
BuJo key with a list of the official symbols with some additional suggested symbols that you can edit. You can add, delete, or change the symbols and explanations.
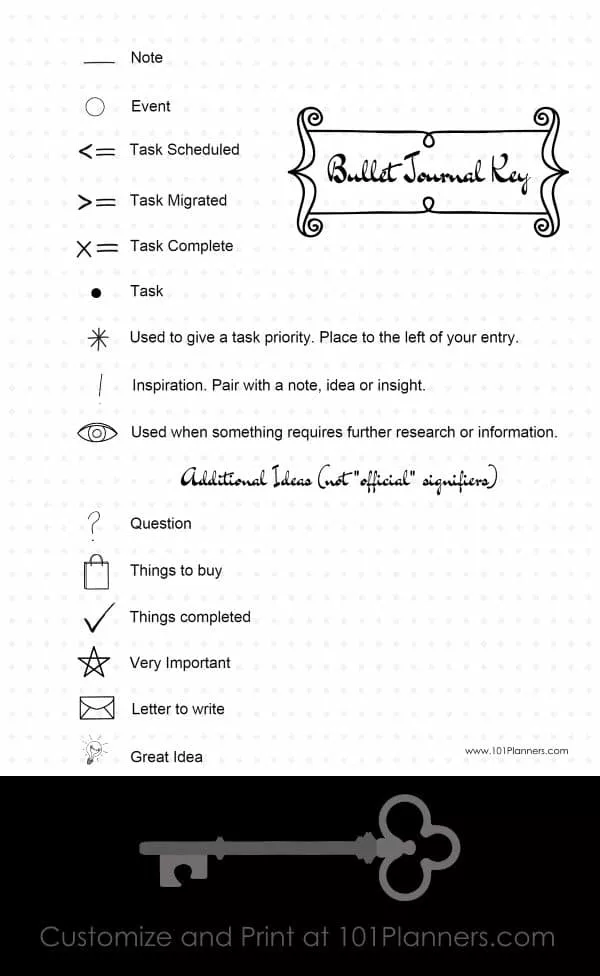
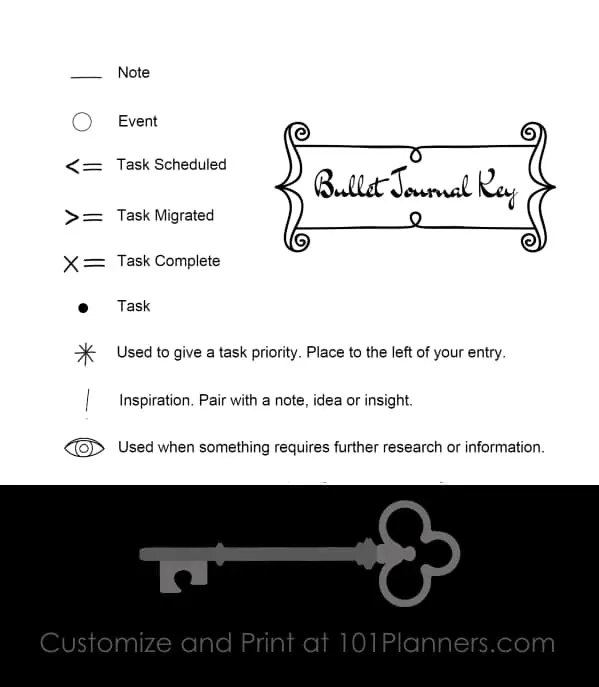
A bullet journal legend with the official symbols and some additional suggested symbols that you can edit with a blank background. You can add, delete, or change the symbols and explanations.
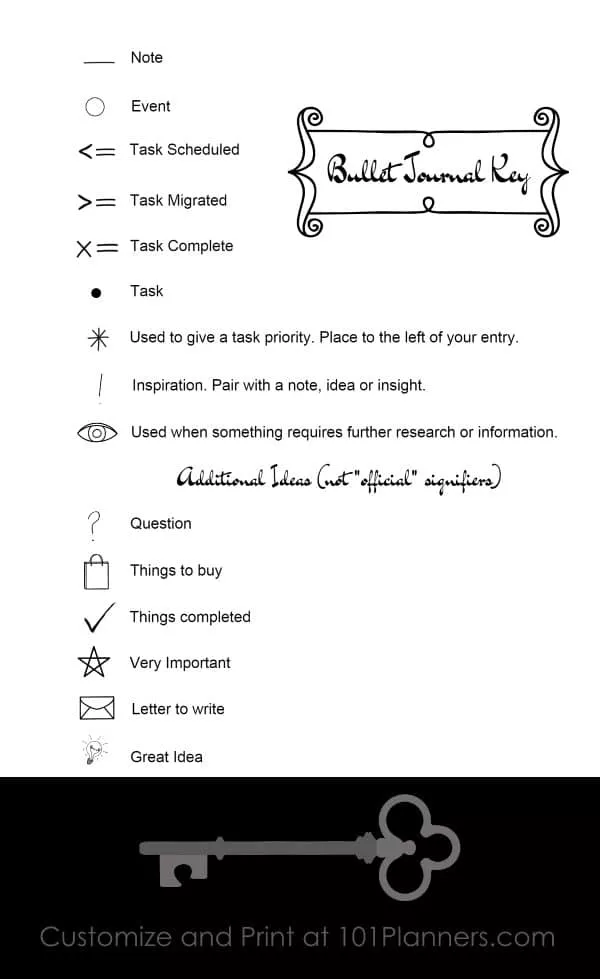
We have five different Bullet Journal key sheets for you to download. You can customize each sheet if you want to change the symbols, text, or add your own.
A list of the official symbols provided by Ryder Carrol on a bookmark. You can add additional symbols from our gallery.
A list of the official symbols provided by Ryder Carrol on a dot grid background.
A quick reference guide with a blank background.
A list of the official symbols with some additional suggested symbols that you can edit. You can add, delete, change the symbols and explanations.
As above, but with a blank background.
Bullet Journal Symbols
The bullet journal system uses symbols, referred to as signifiers, to give your entries additional content. The idea is to quickly capture your thoughts and categorize them into notes, events, and tasks. Once you have done that, you can prioritize them and focus on what is important and meaningful to you.
We have prepared a Bullet Journal cheat sheet that contains a list of symbols below that you can use when you draw your journal or if you create it with our free bullet journal app. You can download the cheat sheet to reference when required. Download it as a PDF or an image (png). Please note that you can personalize the key/cheat sheet before you print it. You can edit the text, change the icons, and add additional symbols and text.
Ryder Carroll, who developed the Bullet Journal Method (or BuJo for short), only gives a few examples. These are the signifiers that he suggests we use for rapid logging.
How to edit the symbol explanation?
Double click on the text that you want to edit and type the text that you want to appear instead.
How to add additional Symbols
To add a Bullet Journal symbol
Click on the image icon.
Select the image that you want to add.
Drag it to wherever you want it to appear.
Make it larger or smaller if necessary.
To add the symbol explanation
Click on the text icon (A).
Type the explanation.
Drag the text.
Make it bigger or smaller so that it looks like the rest of the text.
To embellish your key chart
Click on “click here to select a design” (above the key).
Select the relevant category (such as embellish title, arrow, border, etc.).
Click on the doodle that you want to add.
Move it to the correct location and make it larger/smaller if necessary.
How to Print as a PDF document
Open the key and click on the page icon.
The page will download as a PDF.
Click to rate this page!
[Total: 8 Average: 5]
About the Author My name is Nicole and I love journaling. I have created many free journal templates and journaling tools that I share on this website. I hope that you will find them helpful too.