Free Elf on the Shelf kit with 24 Elf on the Shelf ideas with free printables for each day.

Embrace the Holiday Spirit with Endless Elf Fun!
Welcome to our special holiday extravaganza, where we bring you 24 days of delightful Elf on the Shelf ideas and activities, each with its own unique set of free printables! Our carefully crafted Elf Kit is designed to add an extra layer of joy and wonder to your family’s holiday season. Whether you’re new to the Elf on the Shelf tradition or looking to spice up your existing routine, our kit is the perfect way to count down to Christmas. All the activities can be done at home with things you already have at home. Unlike other Elf on the Shelf kits that are time-consuming to set up, in this Elf kit, all activities take less than 5 minutes to set up and everything is free!
What’s Inside the Elf Kit?
24 Days of Creative Fun: Each day unveils a new activity, with lazy easy Elf on the Shelf ideas ranging from playful games and crafts to heartwarming family moments. Our kit includes everything from Elf on the Shelf games to a thoughtful Letter to Santa, ensuring that every day brings a new surprise and a smile.
Easy-to-Use Printables: We understand the holiday season can be busy, so we’ve made it simple. Each activity comes with free, downloadable printables. Just click, print, and you’re ready to go! Our printables are designed to be user-friendly, colorful, and engaging, making each Elf on the Shelf experience as magical as the next.
Activities for All Ages: Whether you have toddlers, school-aged children, or even teenagers, our Elf Kit caters to all. We’ve included a variety of activities with quick Elf on The Shelf ideas to ensure that every family member can participate and enjoy the holiday fun.
Our Free Elf on the Shelf Kit is more than just activities; it’s about creating lasting holiday memories, sharing laughs, and enjoying the magic of the season together. So, get ready to embark on a 24-day journey filled with joy, creativity, and plenty of Elf antics!
Since we have free printables for each activity that don’t require any work on your part the following ideas are perfect for those looking for quick Elf on The Shelf ideas. Even if it is last minute we have you covered!
When does Elf on the Shelf start?
The Elf on the Shelf tradition typically begins at the start of the Christmas season. Many families choose to welcome their Elf back on December 1st, coinciding with the beginning of Advent. However, the exact start date can vary depending on personal or family traditions. Some may introduce their Elf during Thanksgiving weekend, marking the transition from Thanksgiving to the Christmas festivities, while others might wait until closer to mid-December.
The arrival of the Elf often involves a special setup or an arrival letter, setting the tone for the days leading up to Christmas. This flexibility in start dates allows families to create a holiday tradition that best fits their schedule and enhances their Christmas celebration.
Create the Elf’s Home with a Printable Elf Door
Install a small, magical elf door on a wall or a shelf. Place the elf near the door as if it just arrived. You can use this dedicated area for some of the ideas below.
We offer 6 free printable Elf doors that you can print, cut out, and use to create this door. Print the Elf doors.

Day 1: Welcome Letter or I’m Back Letter!
- Description: The Elf arrives with a welcome note, introducing themselves (or returning) to the family. They also have a banner announcing their arrival, creating excitement for the days ahead, the Elf on the Shelf rules, and an Elf Adoption certificate. Maybe they’re sitting with a small breakfast treat for the kids. If you haven’t already given your elf a name then see our Elf name generator or see our elf names for girls and elf names for boys.
- Printables: welcome note, Elf on the Shelf rules printable, an Elf Adoption Certificate, and two signs below.
- Print an Elf on the Shelf arrival letter.

- Print an Elf Adoption Certificate

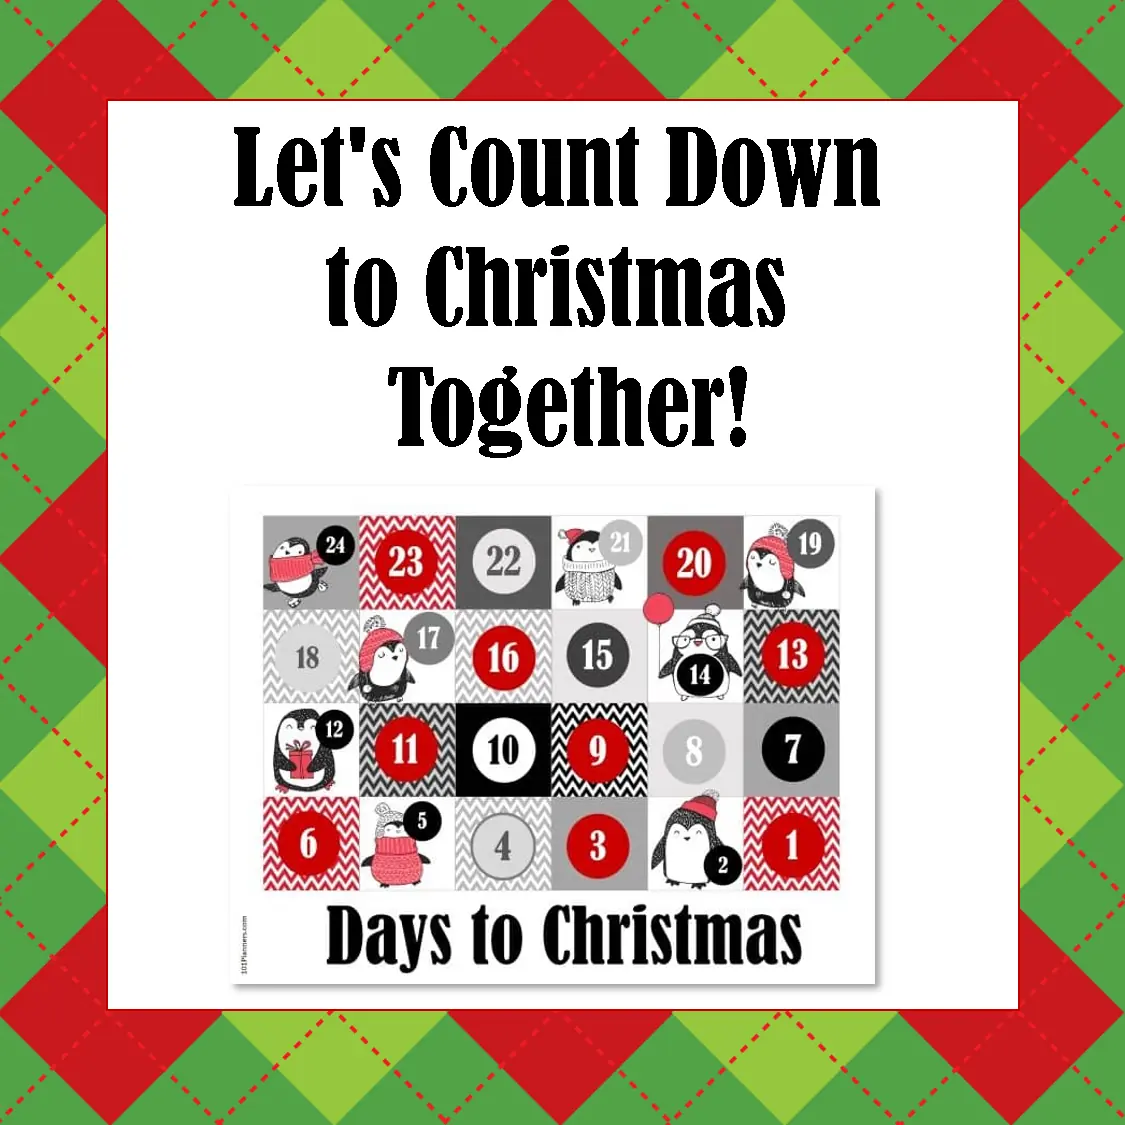
Day 2: Christmas Countdown With Your Elf
What We Provide:
- A free Elf on the Shelf advent calendar (see the Christmas Countdown Printable): A vibrant and festive calendar counting down the days to Christmas.
- Instructional Sign Printable: A sign that reads, “Let’s Count Down to Christmas Together!”
Setting Up Your Christmas Countdown Scene:
- Print the Materials: Download and print the Christmas Countdown calendar and the instructional sign.
- Choose the Location: Find a spot in your home where your Elf and the countdown calendar can be prominently displayed. This could be on a wall in the living room, on the refrigerator, or any place that’s easily accessible to the kids.
- Prepare the Elf: Position your Elf holding a marker or sitting next to the countdown calendar. The Elf should appear as if it’s just marked off the previous day or is about to mark the current day.
- Display the Instructional Sign: Place the sign next to the Elf and the calendar. This sign serves as a fun invitation for the kids to interact with the Elf and the calendar each day.
Daily Interaction:
- Each morning, the children can find the Elf and see which day has been marked off.
- They can then take their turn to mark the current day, building anticipation as Christmas gets closer.
- This daily activity not only adds to the excitement of the holiday season but also helps children understand and engage with the concept of counting down days.
Day 3: Cocoa Day with Your Elf on the Shelf
On the morning of Cocoa Day, the family wakes up to a charming and whimsical scene. The Elf is found in the kitchen or dining area, the central spot for family gatherings and warmth. Next to the elf is a sign “Have a Cup of Cocoa” (see the free printable sign below). This sign is prominently displayed so it’s the first thing the family notices. Next to the elf are empty cups with the free stickers we provide below. If feasible, set up a small hot cocoa station with various toppings like whipped cream, sprinkles, and chocolate shavings for a fun, interactive experience. This cozy setup is perfect for sharing stories or planning the day’s holiday activities. You can also surround your elf with a small array of cocoa-making ingredients – a can of cocoa powder, a small jar of marshmallows, and maybe a spoon or whisk, giving the impression that it’s been busy preparing for Cocoa Day. The Elf might be posed as if it’s pouring cocoa powder into a cup or stirring a tiny mug (if you’ve opted for the more elaborate setup with the mini cocoa cup).

This delightful morning discovery sets the stage for a day filled with warmth, sweetness, and family fun, perfectly capturing the spirit of the holiday season with the Elf on the Shelf. Happy Cocoa Day!
Here’s What You Need to Do for a Simple Cocoa Celebration:
Option 1: Simple and Quick Cocoa Day
This option is perfect for those who want a fun yet straightforward Elf on the Shelf experience.
- Print the Sign: We’ve provided a charming “Have a Cup of Cocoa” sign. Just print it out and place it next to your Elf. This will be a fun way for the Elf to invite everyone to enjoy a cup of hot cocoa.
- Cocoa Stickers: Along with the sign, you’ll find adorable cocoa-themed stickers. These can be used to decorate each child’s cup, adding a personal touch to your cocoa day. You don’t need to print them on sticker paper. You can print on paper and glue them on the cups with paper glue.
- Enjoy Your Cocoa: Gather around with your favorite mugs, pour some hot cocoa, and enjoy this sweet moment together. It’s a perfect time for stories, laughter, and creating warm holiday memories.
Print the sign and cocoa stickers
Looking to Add More Magic? For those who love going the extra mile, we have additional ideas to make your Cocoa Day even more special. From crafting a tiny cup of cocoa for your Elf to setting up an elaborate cocoa station, there are plenty of ways to enhance this experience. Check out our additional options for more fun and creative activities!
Option 2: Go All Out with a Deluxe Cocoa Day
- Description: Ideal for those who love crafting and creating more elaborate setups.
- What to Do:
- Tiny Cup of Cocoa for the Elf:
- Use a thimble or a doll-sized cup.
- Fill it with a brown paper circle (as cocoa) and add a mini marshmallow.
- Place this tiny cup in the Elf’s hands or nearby.
- Elaborate Cocoa Station: Set up a hot cocoa bar with various toppings and decorations.
- Personalized Mugs: Offer DIY decorating of mugs with markers or paint pens.
- Elf-Sized Accessories: Create additional mini items like a tiny cookie plate or a small book for the Elf.
- Storytelling and Photo Booth: Arrange a storytelling corner and a photo booth with festive props.
- For a naughty Elf on The Shelf: You can sprinkle some cocoa powder and chocolate chips.
- Tiny Cup of Cocoa for the Elf:
Day 4: Elf on The Shelf Coloring Pages
Add a splash of color to your Elf on the Shelf tradition with a fun-filled Coloring Day! This activity is perfect for encouraging creativity and providing a relaxing family activity. Below are the instructions for setting up this special day.

Coloring Day with your Elf on the Shelf is more than just an activity; it’s a chance to create lasting memories and foster a sense of togetherness. Enjoy this colorful, creative day!
The scene: The setup is in a family common area, like the living room or at a kitchen table, where there’s plenty of space for everyone to join in. The Elf is holding crayons or markers, surrounded by coloring pages for the kids to join in on the fun. Next to the elf is a sign, reading “Let’s Color Together! Join me for a day of coloring fun!”. A variety of Elf-themed coloring pages are spread out around the Elf. An array of coloring supplies – colored pencils, markers, and crayons – are neatly arranged near the coloring pages.
Free Printables:
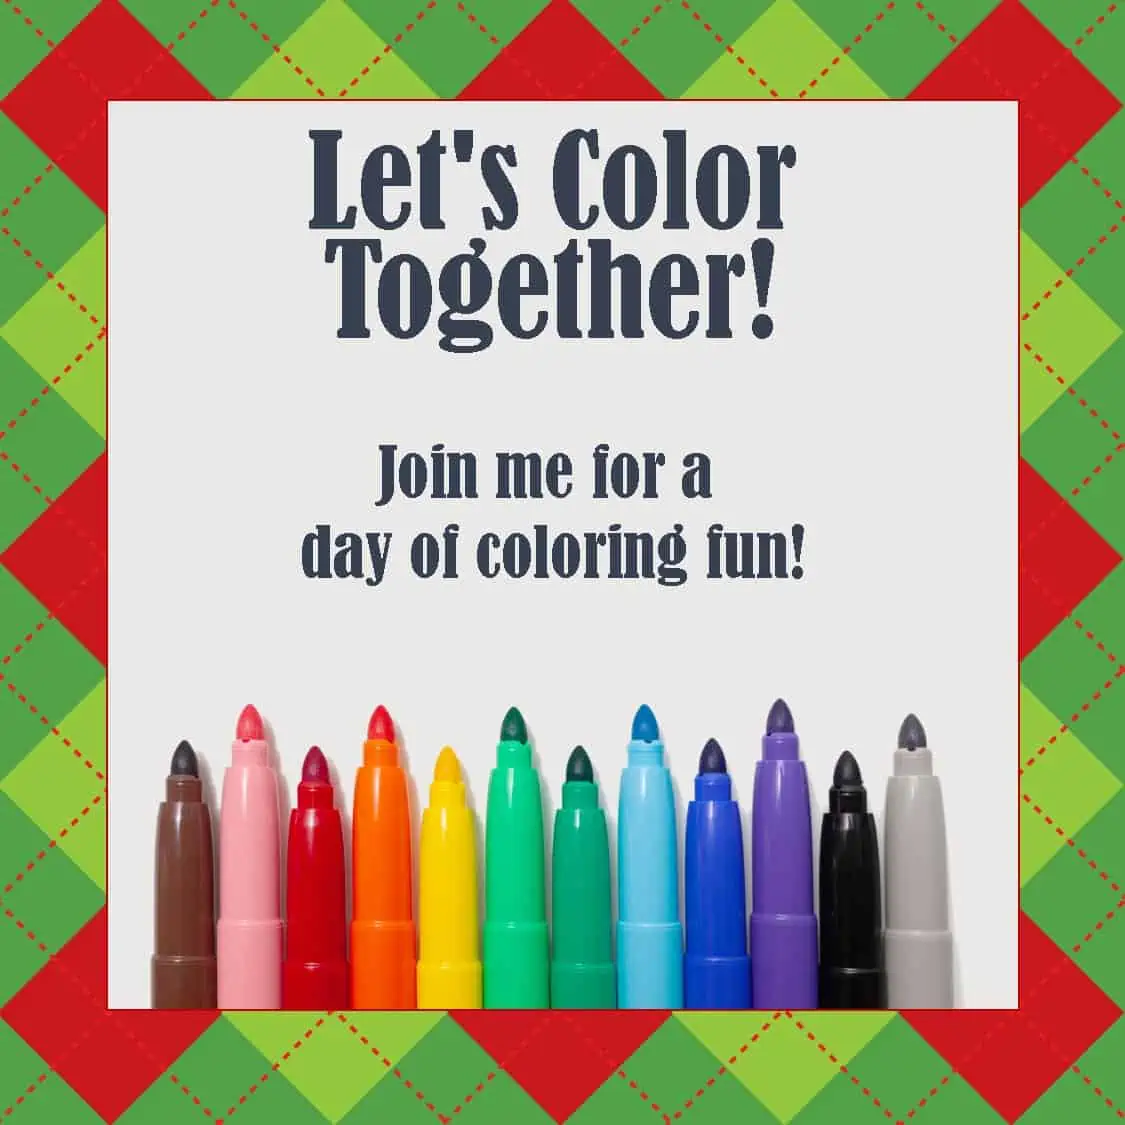
Coloring Pages: A selection of Christmas coloring pages.
Setting Up Coloring Day:
- Print the Materials: Download and print the “Let’s Color Together!” sign and the coloring pages above.
- Prepare the Coloring Area:
- Choose a spot in your home where you usually place your Elf.
- Arrange a table or a comfortable area on the floor for coloring.
- Lay out the coloring pages in an inviting way.
- Place a variety of colored pencils, markers, or crayons nearby.
- Positioning the Elf:
- Place your Elf next to the coloring pages, ideally holding a colored pencil or marker.
- Make sure the Elf is facing the coloring area, looking ready and excited to color.
- Display the Sign:
- Position the “Let’s Color Together!” sign next to the Elf where it’s easily visible.
- This sign serves as an invitation from the Elf to the family to join in the coloring fun.
Instructions for the Family:
- When your family discovers the Elf and the coloring setup, gather everyone to start coloring.
- Encourage each family member to choose their favorite coloring page.
- Share a special family moment as you all color together. It’s a great opportunity for conversation, storytelling, and a bit of creative relaxation.
- You might even set a theme or challenge, like who can use the most creative color combinations or who can tell a story about their coloring page.
- Once everyone has finished coloring, you can display the artwork in a prominent place in your home, like on the refrigerator or a bulletin board, to celebrate everyone’s creativity.
Day 5: Letter to Santa Day
Craft a Magical Letter to Santa with Your Elf on the Shelf
Welcome to today’s enchanting activity from our Free Printable Elf on the Shelf Kit! It’s time to connect with the jolly man in the red suit through a heartfelt Letter to Santa. This activity is not just fun; it’s a wonderful way for kids to express their Christmas wishes and thoughts.
What We Provide:
- Santa Letterhead Printable: Beautifully designed paper that will make writing to Santa an extra special experience. See letter to Santa we also provide a Santa envelope.
- Instructional Sign Printable: A sign that reads, “Write Your Letter to Santa! What are your Christmas wishes?”


Setting Up Your Letter to Santa Scene:
- Print the Materials: Download and print the Santa Letterhead, Santa envelope and the instructional sign.
- Choose the Location: Set up a cozy writing spot, like a table or a comfortable corner in your living room. Ensure it’s a place where the kids can sit down and write comfortably.
- Prepare the Elf: Place your Elf next to the Santa Letterhead, perhaps with a pen or pencil, as if it’s ready to write its own letter.
- Display the Instructional Sign: Position the sign next to the Elf and the letterhead. This sign will guide the kids on what to do and spark their excitement to write their own letters to Santa.
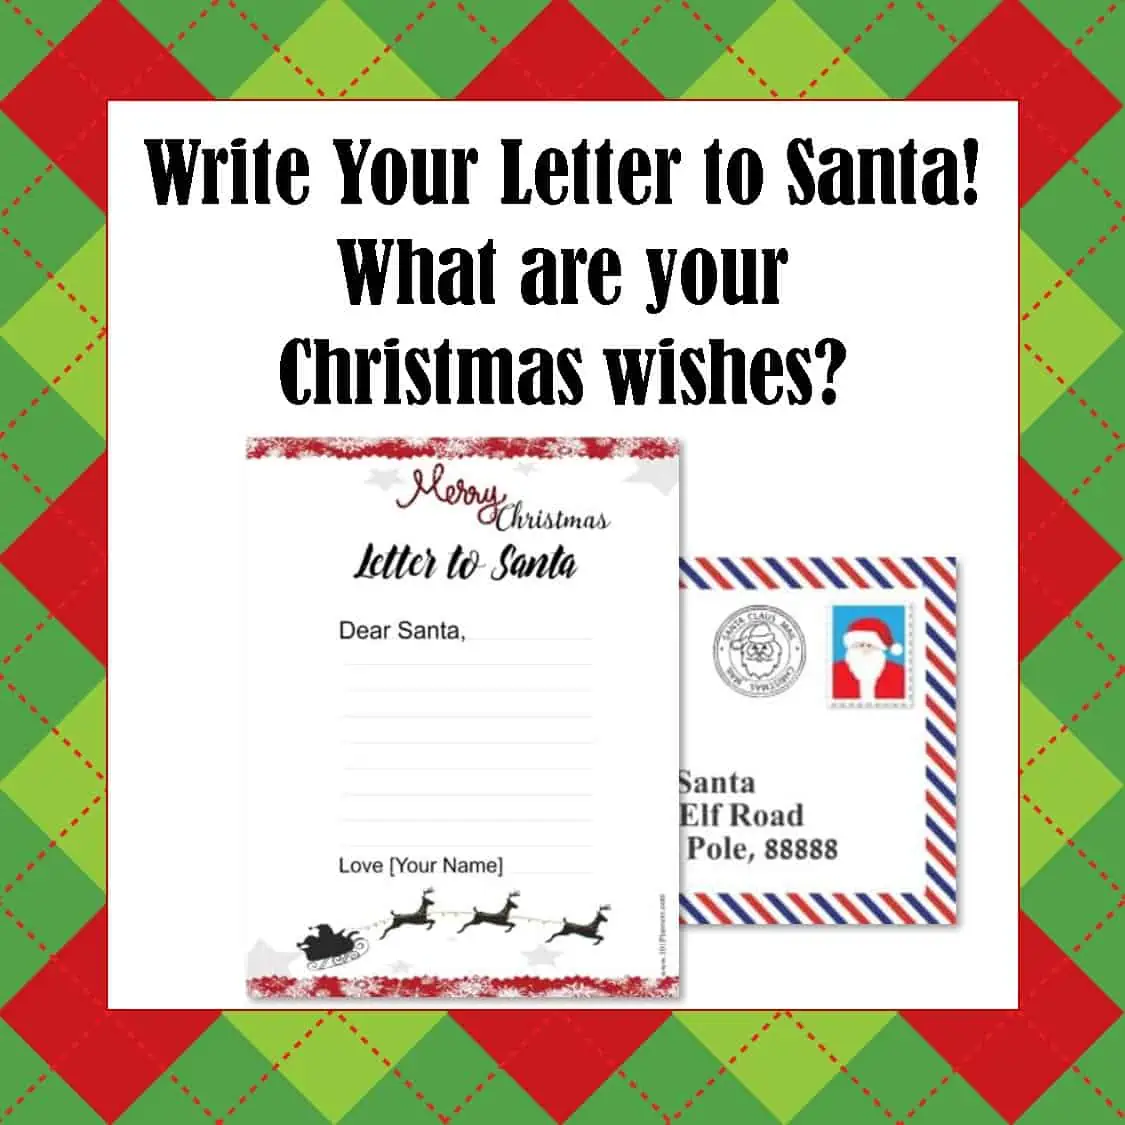
The Elf appears to be pondering its Christmas wishes, inspiring the kids to think about their own. The Santa Letterhead is laid out invitingly, complete with festive designs, making the task of writing to Santa a joyous occasion. The instructional sign is clearly visible, encouraging the children to engage in the activity.
Encouraging the Kids:
- Invite the children to sit down and think about what they would like to write to Santa. It could be their Christmas wishes, questions for Santa, or even their achievements and good deeds throughout the year.
- Provide pens, pencils, and maybe some festive stickers or stamps for them to decorate their letters.
Sending the Letters:
- Once the letters are written, you can create a special “Santa Mailbox” where the letters can be placed. Alternatively, the letters can be left with the Elf, who will ‘magically’ send them to the North Pole overnight.
- This activity not only fuels the children’s imagination but also helps them practice their writing and expression skills.
Capture the Joy:
- Take photos of your children writing their letters or posing with their finished letters and the Elf.
Day 6: Christmas Bingo
Join the Festive Fun with Christmas Bingo and Your Elf on the Shelf
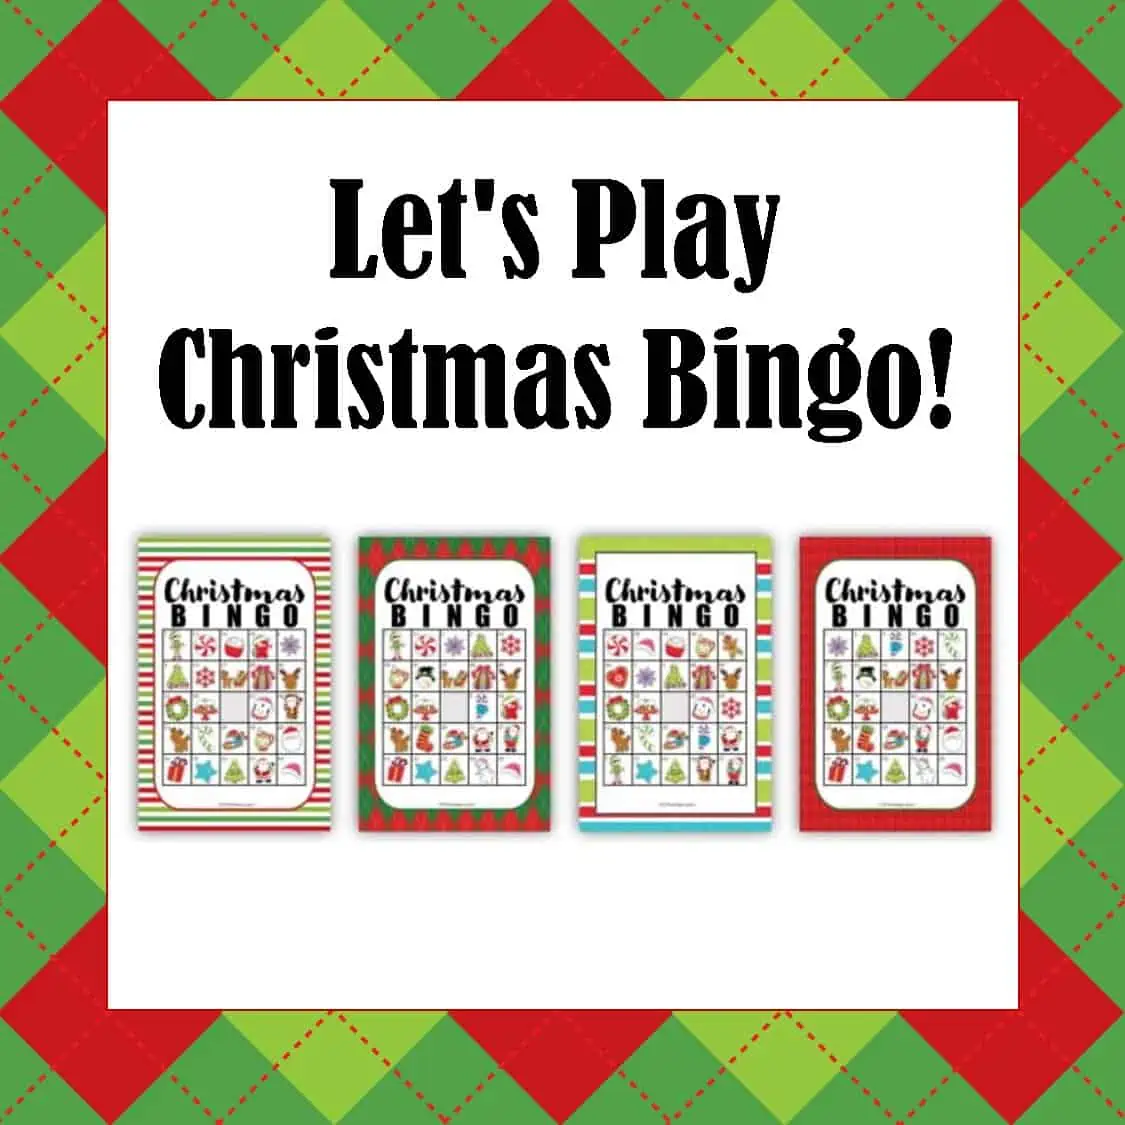
Welcome to another exciting day with our Free Printable Elf on the Shelf Kit! Today, we’re bringing you a classic game with a festive twist – Christmas Bingo. This activity is perfect for family game night, offering fun and laughter for everyone.

Christmas Bingo Day
What We Provide:
- Christmas Bingo Cards Printable: A set of unique, holiday-themed Bingo cards. See Christmas bingo
- Bingo Markers Printable: Festive markers to use during the game.
- Instructional Sign Printable: A sign that reads, “Let’s Play Christmas Bingo!”
Setting Up Your Christmas Bingo Scene:
The Elf is eagerly looking at a Bingo card, creating a sense of anticipation for the game. The Bingo cards are spread out, each with a different arrangement of festive items. The Bingo markers can be placed in a small bowl or container, ready for use.
- Print the Materials: Download and print the Christmas Bingo cards and markers, along with the instructional sign.
- Choose the Location: Set up a comfortable area where the family can gather to play, like the living room or dining table.
- Prepare the Elf: Position your Elf with a Bingo card and a marker, as if it’s ready to join in on the game.
- Display the Instructional Sign: Place the sign near the Elf and the Bingo setup. This will invite the family to start the game and provide clear instructions on what to do.
Playing the Game:
- Gather the family and hand out the Bingo cards and markers.
- You can take turns calling out items from the cards or use a random drawing method.
- As items are called, players mark them on their cards. The first to complete a line shouts “Bingo!” and wins.
- Feel free to play multiple rounds and maybe have small prizes for the winners.
Encouraging Family Time:
- Christmas Bingo is a great way to bring the family together for some holiday fun.
- It’s a game that’s easy for all ages, ensuring everyone can participate.
Capture the Fun Moments:
- Don’t forget to snap some pictures of your family playing Christmas Bingo with the Elf.
If you don’t like bingo you might want to check out our other Elf on the Shelf games.
Day 7: Joke Day
Get Ready to Giggle with Joke Day and Your Elf on the Shelf
Welcome to a day filled with laughter and cheer with our Free Printable Elf on the Shelf Kit! Today is Joke Day, a perfect opportunity to share some giggles and smiles with your family. Let’s dive into a day of lighthearted fun!

What We Provide:
- Elf-sized Joke Cards Printable: A collection of kid-friendly jokes that are sure to bring laughter.
- Instructional Sign Printable: A sign that reads, “It’s Joke Day! Laugh along with me!”
Jokes for the Cards:
- Why don’t scientists trust atoms? Because they make up everything!
- What do you call a bear with no teeth? A gummy bear!
- How does a penguin build its house? Igloos it together!
- What do you get when you cross a snowman and a vampire? Frostbite!
- Why was the math book sad? Because it had too many problems.
- What do elves learn in school? The elf-abet!
- How do you catch a squirrel? Climb a tree and act like a nut!
- Why did the cookie go to the doctor? Because it felt crumbly.
- What do you call an old snowman? Water!
- Why did the tomato turn red? Because it saw the salad dressing!
Setting Up Your Joke Day Scene:
- Print the Materials: Download and print the Elf-sized joke cards and the instructional sign.
- Choose the Location: Find a spot in your home where the Elf and the jokes can be easily seen, like on a shelf or a kitchen counter.
- Prepare the Elf: Position your Elf surrounded by the joke cards, perhaps holding one as if it’s just read the joke.
- Display the Instructional Sign: Place the sign next to the Elf and the joke cards. This sign encourages the family to read and share the jokes.
Creating the Scene:
- The Elf looks playful and mischievous, surrounded by joke cards.
- The joke cards are arranged so that they are easy for the family to pick up and read.
- The scene is set in a way that invites immediate interaction and sharing of jokes.
Sharing the Laughter:
- Encourage family members to take turns reading the jokes aloud.
- You can even have a mini-competition to see who can come up with the funniest joke or who can read the jokes without laughing.
- It’s a great way to start the day with a positive and joyful mood.
Capture the Joyful Moments:
- Take photos or videos of your family reading the jokes and laughing together.
Day 8: Maze Day Activity
Navigate the Fun with Maze Day and Your Elf on the Shelf
Today, we’re excited to present Maze Day, a fantastic way to challenge your family’s minds and have fun together.
What We Provide:
- Elf-sized Maze Printable: A specially designed, fun, and challenging maze. You can either print this full size or elf-sized by changing the settings on your printer.
- Instructional Sign Printable: A sign that reads, “Can you help me solve this maze?”
Setting Up Your Maze Day Scene:
- Print the Materials: Download and print the full-sized or Elf-sized maze and the instructional sign.
- Choose the Location: Set up the maze in a spot where it’s easily accessible, like on a coffee table or a kitchen counter.
- Prepare the Elf: Position your Elf at the start of the maze, with a miniature pencil or pointer, as if it’s pondering how to solve it.
- Display the Instructional Sign: Place the sign next to the Elf and the maze. This will invite the family to engage with the maze and assist the Elf in finding the solution.
Engaging in the Activity:
- Invite family members to take turns trying to solve the maze.
- You can make it more exciting by timing each person to see who can solve it the fastest.
- For younger children, guide them through the maze, making it a collaborative effort.
Encouraging Teamwork and Problem-Solving:
- Maze Day is not just fun; it’s a great way to develop problem-solving skills and encourage teamwork.
- Celebrate each family member’s attempt and solution, fostering a supportive and positive environment.
Capture the Concentrated Efforts:
- Snap pictures or record videos of your family members as they navigate the maze.
Day 9: Movie Night
Enjoy a Cozy Movie Night with Your Elf on the Shelf
Welcome to a special evening filled with relaxation and entertainment! Tonight, we’re setting the stage for a memorable Movie Night. Gather your family, pick your favorite film, and let the magic of cinema bring you closer together.
Movie Night
What We Provide:
- Movie Ticket Printables: Adorable Elf-sized movie tickets for a touch of cinema authenticity.
- Popcorn Box Printable: A cute, miniature popcorn box to enhance the movie atmosphere (optional). You can also just put popcorn in a bowl if you can’t be bothered to prepare a popcorn box.
- Instructional Sign Printable: A sign that reads, “It’s Movie Night! Grab a ticket and join me for a film!”
This page includes the printable sign and six movie tickets.
Setting Up Your Movie Night Scene:
- Print the Materials: Download and print the movie tickets, popcorn box (optional), and the instructional sign.
- Choose the Location: Set up the scene in your living room or wherever you usually watch movies. Make sure there’s comfortable seating and a good view of the screen.
- Prepare the Elf: Position your Elf holding a movie ticket, with the mini popcorn box nearby. You can even place the Elf in a small chair or makeshift cinema seating.
- Display the Instructional Sign: Place the sign next to the Elf, the tickets, and the popcorn box. This will invite the family to engage in movie night and create a fun, cinema-like experience.
Creating the Scene:
- The Elf looks excited, as if eagerly waiting for the movie to start.
- The movie tickets are arranged so family members can ‘collect’ them before the movie begins.
- The mini popcorn box adds a charming touch, making the scene more realistic and engaging.
Enjoying Movie Night:
- Prepare some real popcorn and other movie snacks to enjoy together.
- Decide as a family which movie to watch – perhaps a Christmas classic or a new release.
Creating a Cozy Atmosphere:
- Dim the lights and maybe add some blankets and pillows for extra coziness.
- If you have a projector, consider using it for an authentic cinema experience.
Capture the Movie Magic:
- Take photos of your family with the Elf, the tickets, and the popcorn before the movie starts.
Day 10: Christmas Wish List Activity with Elf on the Shelf
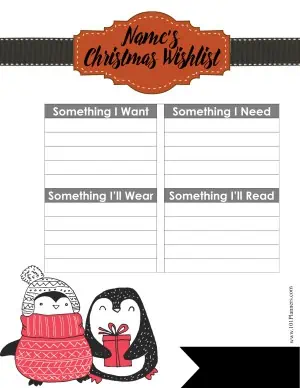
Make your holiday wishes known with our Elf on the Shelf Christmas Wish List activity! Following the thoughtful 4 Gift Rule, your Elf invites everyone to choose four special gifts they desire this Christmas. Think about something you want, something you need, something to wear, and something to read. What will you choose?
Setting Up the Christmas Wish List Activity:
Materials Provided on the Website:
- 4 Gift Rule Wish List Printable: A wish list template categorized into ‘Something you want’, ‘Something you need’, ‘Something to wear’, and ‘Something to read’. This can be downloaded here: Christmas wish list
- Instructional Sign: A sign that reads, “What are your Christmas wishes? Let’s make a list with the 4 Gift Rule!”

Preparing the Christmas Wish List:
- Print the Wish List: Download and print the 4 Gift Rule Wish List template from our website.
- Set Up the Wish List Area: Choose a spot in your home, like a family room or kitchen table, where the wish list activity can take place.
- Position the Elf: Place your Elf next to the wish list printouts, perhaps with a pen or pencil, as if it’s ready to jot down its own Christmas wishes.
- Display the Instructional Sign: Set up the sign next to the Elf and the wish list printouts. This will guide the family members to participate in the activity and think about their wishes.
Engaging in the Activity:
- Invite each family member to take a wish list and reflect on the four categories: something they want, need, to wear, and to read.
- Encourage thoughtful consideration, discussing as a family why certain items might be meaningful or necessary.
- This activity is not only fun but also a great opportunity to teach about thoughtful giving and mindful receiving.
Capture the Wish-Making Moments:
- Take photos of your family members writing their wish lists with the Elf as their festive companion.
- Share these moments on social media to showcase the joy and thoughtfulness of the holiday season.
This Christmas Wish List activity with the Elf on the Shelf, guided by the 4 Gift Rule, offers a meaningful way to approach gift-giving during the holidays. It encourages thoughtful consideration of each gift, making the holiday season more about the value of each item rather than the quantity.
Day 11: Hopscotch Game Activity
Hop into Fun with Elf on the Shelf Hopscotch Game Day
Welcome to a day of active fun and playful challenges with our Free Printable Elf on the Shelf Kit! Today, we’re excited to introduce an Elf-themed Hopscotch game. It’s a wonderful way to get the family moving, laughing, and enjoying some healthy, active play.

Elf Hopscotch Game Day
What We Provide:
- Elf Hopscotch Mat Printable: A vibrant, Elf-inspired hopscotch mat.
- Instructional Sign Printable: A sign that reads, “Let’s Play Hopscotch”
Printable hopscotch game and sign
Setting Up Your Elf Hopscotch Game Day:
- Print the Materials: Download and print the Elf Hopscotch mat and the numbered markers, along with the instructional sign.
- Choose the Location: Find a flat surface in your home or outdoors, like a driveway, patio, or a spacious room, where a hopscotch mat can be laid out. If you don’t have one then draw one outside with chalk.
- Prepare the Elf: Position your Elf at the start of the hopscotch mat, as if it’s ready to hop into the game.
- Display the Instructional Sign: Place the sign near the Elf and the hopscotch mat. This will invite the family to join in and provide clear instructions for the game.
Playing the Game:
- Invite family members to take turns hopping through the hopscotch course, following the numbers in order.
- Players can throw a small stone or beanbag onto a number and skip that square, adding a bit of challenge to the game.
- The game can be made more interesting for older kids or adults by adding variations, like hopping on one foot or using a timer.
Encouraging Physical Activity:
- The Elf Hopscotch game is a great way to encourage exercise and coordination in a fun and playful manner.
- It’s a game that can be enjoyed by all ages, making it perfect for family bonding.
Capture the Hopping Fun:
- Take photos or videos of your family playing hopscotch with the Elf.
Day 12: Snowflake Making
Welcome to a day of winter wonder and creativity with the Elf on the Shelf Snowflake Making activity! Gather your scissors and let your imagination soar as you cut, craft, and create beautiful snowflakes together with your Elf.

Materials Provided on the Website:
- Snowflake Templates: A variety of printable snowflake templates in different designs. 16 snowflake gift tags and 2 snowflake boxes.
- Instructional Sign: A sign that reads, “Let’s Make Snowflakes!”
Print the snowflake templates and instructional sign.
Setting Up Snowflake Making Day:
- Print the Templates: Download and print the snowflake templates from our website. Choose a range of designs to cater to different skill levels.
- Prepare the Crafting Area:
- Select a space in your home where you usually place your Elf, like a table or countertop.
- Lay out the snowflake templates along with safety scissors (especially important if young children are participating).
- You can also include colored paper, glitter, and glue for decorating the snowflakes.
- Positioning the Elf:
- Place your Elf amidst the crafting materials, perhaps holding a pair of scissors or a partially cut snowflake, as if it’s in the middle of crafting.
- Ensure the Elf is visible and appears engaged in the activity.
- Display the Instructional Sign:
- Position the “Let’s Make Snowflakes!” sign next to the Elf and the crafting materials. This sign serves as an invitation for the family to join in the snowflake-making fun.
Instructions for the Family:
- Gather around the crafting area and select a snowflake template to start with.
- Carefully cut out the snowflake designs following the templates. Younger children may need assistance with cutting.
- Once the snowflake gift tags and boxes are cut out, you can decorate them with glitter, color them, or even string them up to create a hanging decoration.
- Share a special family moment as you all craft together, creating unique snowflake crafts and decorating your home.
- Display the finished snowflakes around the house or on your Christmas tree as part of your holiday decorations.
Capture the Crafty Moments:
- Take photos of your family engaged in snowflake crafts with the Elf. Share these creative moments on social media to spread the holiday cheer.
By following these instructions, you can create a fun and engaging Snowflake Making Day with your Elf on the Shelf, fostering creativity and family bonding during the holiday season.
Day 13: Candy Cane Hunt Activity
Join in the festive fun with our Elf on the Shelf Candy Cane Hunt! It’s a sweet adventure as you follow clues and discover hidden candy canes that your Elf hid around the house.

Setting Up the Candy Cane Hunt:
Materials Provided on the Website:
- Candy Cane Clues Printable: A set of clever, rhyming clues leading to various locations around your home.
- Instructional Sign: A sign that reads, “Let’s go on a Candy Cane Hunt! Follow the clues with me!”
Print the treasure hunt clues and the sign
Preparing the Candy Cane Hunt:
- Print the Clues and Sign: Download and print the set of Candy Cane Clues and the Instructional Sign.
- Hide the Candy Canes: Before the family wakes up, hide candy canes around the house based on the locations mentioned in the clues.
- Place the First Clue: Position your Elf with the first clue in a visible spot where your family usually encounters the Elf in the morning.
- Display the Instructional Sign: Set up the sign next to the Elf to kickstart the hunt.
Sample Clues for the Candy Cane Hunt:
- Clue #1 (with the Elf): “Your first clue is quite near, find the next one where you hear music in your ear.” (Next clue near a radio or music player)
- Clue #2: “You’re doing great, don’t slow down! Look for the next clue where you’d wear a gown.” (Next clue in a closet or dressing area)
- Clue #3: “This hunt is fun, you’re doing well! The next clue rests where you can smell delightful scents and dinner bell.” (Next clue in the kitchen)
- Clue #4: “Almost there, just a few more, the next clue is near the front door.” (Next clue near the entrance)
- Clue #5: “You’re nearly done, don’t lose your pace, the final clue is in a cozy place.” (Final clue near a fireplace or a cozy corner)
Completing the Hunt:
- As the family finds each clue, they collect a candy cane and move on to the next location.
- The final clue can lead to a small prize or a larger stash of candy canes.
Capture the Fun:
- Take photos of your family during the hunt and their delighted faces as they find each candy cane.
- Share these moments on social media to spread the holiday cheer.
This Candy Cane Hunt with the Elf on the Shelf is a delightful way to add excitement and joy to your holiday festivities, creating lasting memories as you search for sweet treats together with your Elf.
Day 14: Marshmallow Bath
Get ready for some bubbly fun with our Elf on the Shelf Marshmallow Bath activity! Tonight, your Elf is taking a unique bath, and it’s inviting the kids to join in on the bathtime fun.

Setting Up the Marshmallow Bath in the Bathroom:
Creating the Scene:
- Select a Small Container: Find a small, shallow container or bowl that can safely sit on a bathroom surface. This will serve as the Elf’s bathtub.
- Fill with Mini Marshmallows: Fill the container with mini marshmallows to mimic a bubble bath.
- Position the Elf: Carefully place your Elf in its marshmallow bath. Arrange it so it looks like it’s enjoying a relaxing soak.
- Add Bath Accessories: Include a tiny towel (a piece of cloth or a small washcloth) and a small toy rubber duck to complete the bath scene.
Displaying the Scene:
- Set up this whimsical scene on a bathroom counter, shelf, or another safe spot in the bathroom where it can be easily seen during the kids’ bathtime.
- Ensure the setup is stable and won’t accidentally fall into water or be in the way of bathroom use.
Instructional Sign for Kids:
- Create and display a playful sign next to the Elf that reads, “Even Elves need bath time! Don’t forget to take YOUR bath too!”
- This sign serves as a fun reminder for kids to take their baths, making it part of the nightly routine.
Print the instructional sign
Encouraging Bathtime Fun:
- Use this setup as an opportunity to make bathtime more appealing and fun for the kids.
- You can even add some extra marshmallows in a separate bowl or bag as a post-bath treat (to eat, not for the bath!).
Capture the Bathtime Joy:
- Snap a photo of the Elf enjoying its marshmallow bath. Share it with friends and family to spread the joy of this unique bathtime.
- After the kids’ bath, they can pose with their Elf friend, showing that they followed its good example.
Day 15: Cookie Making with Elf on the Shelf
Roll, shape, and bake your way into a delightful day with our Elf on the Shelf Cookie Dough making activity! Your Elf has prepared some cookie dough and invites the kids to get creative by making and baking their own cookie shapes.

Setting Up the Cookie Dough Shapes Activity:
Creating the Scene:
- Prepare a Safe Spot in the Kitchen: Choose an area in the kitchen where the Elf can be placed, away from any heat sources or kitchen hazards.
- Place the Cookie Dough: Have a bowl of ready-to-use cookie dough near the Elf. If you’re using store-bought dough, you can simply place the package next to the Elf.
- Position the Elf: Situate your Elf next to the cookie dough, possibly with a rolling pin or cookie cutters, as if it’s ready to start shaping the dough.
Displaying the Instructional Sign:
- Print the sign that reads, “Let’s Make Cookies!”
- Place this sign prominently next to the Elf and the cookie dough to catch the kids’ attention and guide them through the activity.
Encouraging the Baking Activity:
- Encourage the kids to use their imagination to create various shapes from the cookie dough. They can use cookie cutters or even shape the dough by hand.
- Provide different cookie cutters, if available, to inspire a range of shapes and designs.
Preparing for Cookie Making:
- Ensure you have a clean, flat surface ready for rolling out the dough.
- Preheat the oven to the temperature required for the cookie dough.
- Have baking sheets lined with parchment paper ready for the shaped cookies.
- Gather any additional decorations or toppings, like sprinkles or icing, that the kids can use to decorate their cookies after baking.
Baking the Cookies:
- Once the kids have shaped their cookies, help them place the cookies on the prepared baking sheets.
- Supervise as they bake the cookies according to the recipe’s instructions.
- After baking, allow the cookies to cool before moving on to decorating.
Decorating and Enjoying the Cookies:
- Set up a decorating station with various toppings and icings.
- Encourage the kids to decorate their baked cookies in their own unique styles.
- Enjoy the cookies together as a family, perhaps with a glass of milk or a cup of hot cocoa.
Capture the Creative Fun:
- Take photos of the kids rolling, shaping, and decorating their cookies with the Elf overseeing the process.
- Share these delightful moments on social media to spread the holiday cheer and showcase the kids’ creativity.
Day 16: Let’s Play Tic Tac Toe

Strategize and play in a festive way with our Elf on the Shelf Tic Tac Toe Game Day! Join your Elf for a friendly match of tic-tac-toe, with a special printable board and sweet markers for a delightful game time.
Setting Up the Tic Tac Toe Game:
Materials Provided on the Website:
- Tic Tac Toe Board Printable: A festive, Elf-themed tic-tac-toe board.
- Miniature Tic Tac Toe Set: A smaller version of the tic-tac-toe board for the Elf.
- Instructional Sign: A sign that reads, “Let’s Play Tic Tac Toe! Can you beat me?
Print the sign, tic-tac-toe board and markers.
Preparing the Tic Tac Toe Game:
- Print the Board: Download and print the full-sized tic-tac-toe board and the miniature version.
- Gather Markers: Use small candies, buttons, or any suitable items as markers for the game. Ensure you have two distinct types for the ‘X’s and ‘O’s.
- Set Up the Elf’s Game: Place the miniature tic-tac-toe board next to the Elf, arranging a game in progress. The Elf can be holding one of the markers.
- Display the Instructional Sign: Position the sign next to the Elf and the mini game board, inviting the family to join in on the fun.
- The Elf looks engaged and ready for a playful challenge, positioned as if it’s contemplating its next move in the mini tic-tac-toe game.
- The candy or button markers are neatly arranged beside the board, ready for use.
Encouraging Family Participation:
- Invite family members to challenge each other or the Elf to a game of tic-tac-toe.
- You can create a fun rule where each winner gets to enjoy a piece of the candy used as markers.
- For younger children, this can be an excellent opportunity to teach them the game and develop their strategic thinking.
Capture the Fun Moments:
- Take photos of the family playing tic-tac-toe, capturing both concentration and laughter.
- Share these moments on social media, showcasing your family’s festive spirit and the Elf’s involvement in the day’s activity.
Day 17: Word Search Puzzle Day with Elf on the Shelf
Embark on a word-finding adventure with our Elf on the Shelf Word Search Puzzle Day! Your Elf has prepared a stack of festive word search puzzles, ready for a day of word discovery and fun.

Setting Up the Word Search Puzzle Activity:
Materials Provided on the Website:
- Word Search Puzzles Printable: A collection of holiday-themed word search puzzles with varying levels of difficulty.
- Instructional Sign: A sign that reads, “Can you find all the hidden words? Join me in this word search challenge!”
Print the word search puzzle and sign
Preparing the Word Search Puzzle Game:
- Print the Puzzles: Download and print the word search puzzle from our website.
- Set Up the Puzzle Area: Choose a comfortable spot in your home, like a dining table or a cozy nook, where the puzzle can be easily accessed and worked on.
- Position the Elf: Situate your Elf on the word search puzzle, perhaps with a pencil or magnifying glass, as if it’s deeply involved in finding words.
- Display the Instructional Sign: Place the sign prominently next to the Elf and the puzzles. This will encourage the family to dive into the word search activity and enjoy the challenge.
Engaging in the Activity:
- Encourage family members to take the word search puzzle and start looking for the hidden words.
- Provide pens or pencils for marking off the found words.
- You can make a copy for each person and create a friendly competition to see who finds all the words first or who can find the most words in a set time.
Encouraging Learning and Fun:
- Word search puzzles are excellent for enhancing vocabulary, spelling, and pattern recognition, especially for younger participants.
Capture the Puzzle-Solving Moments:
- Take photos of your family engaged in solving the word search puzzles with the Elf as their companion.
- Share these moments on social media to showcase the fun and educational side of your holiday activities.
This Word Search Puzzle Day with the Elf on the Shelf offers a perfect blend of learning, challenge, and festive fun, making it an engaging and enriching activity for the entire family.
Day 18: Twister Game Activity
Twist into Fun with Elf on the Shelf Twister Game Night
Get ready to bend, stretch, and laugh with our Free Printable Elf on the Shelf Kit! Today, we’re bringing a twist to your holiday fun with an Elf-themed Twister game. It’s a fantastic way to get the family moving and enjoying some hilarious moments together.

Elf on The Shelf Twister Game Night
What We Provide:
- Elf Twister Mat Printable: A colorful, Elf-themed Twister mat.
- Twister Spinner Printable: A custom spinner to direct the game.
- Instructional Sign Printable: A sign that reads, “Let’s Get Twisted!”
Setting Up Your Elf Twister Game Night:
- Print the Materials: Download and print the Elf Twister mat and the spinner, along with the instructional sign. Those who are into DIY, can make their spinner spin.
- Choose the Location: Find a spacious area in your home, like the living room or a playroom, where there’s enough space to lay out the Twister mat and move freely. If you don’t have the Twister game then either buy it or borrow one. If you don’t want to join in then you can just set up the Elf to play without having the family join in.
- Prepare the Elf: Position your Elf near the Twister mat, perhaps in a funny pose, as if it’s already playing the game.
- Display the Instructional Sign: Place the sign near the Elf and the Twister mat. This will invite the family to join in and provide guidance on how to play.
Creating the Scene:
- The Elf looks playful and ready for action, adding excitement to the game setup.
- The Twister mat is spread out on the floor, with the colorful circles clearly visible.
- The spinner is placed within easy reach to guide the game.
Playing the Game:
- Gather the family around the Twister mat and explain the rules. Each player takes turns spinning the spinner and follows the instructions, placing their hands or feet on the corresponding colored circles.
- Encourage each player to try and hold their pose without falling, leading to lots of laughter and fun.
- The game is great for all ages and can be adapted for younger players.
Encouraging Active Play:
- The Elf Twister game is not just fun; it’s a great way to encourage physical activity and coordination.
- Celebrate each player’s efforts and enjoy the spontaneous and funny positions everyone ends up in.
Capture the Twisted Fun:
- Take photos or videos of your family playing the Elf Twister game.
Day 19: Christmas Card Writing Activity with Elf on the Shelf
Spread holiday cheer with our Elf on the Shelf Christmas Card Writing activity! Your Elf has brought a selection of printable Christmas cards, inviting everyone to express their heartfelt messages to friends and family.

Setting Up the Christmas Card Writing Activity:
Materials Provided on the Website:
- Christmas Card Printables: A variety of 12 festive Christmas card designs suitable for printing.
- Instructional Sign: A sign that reads, “Let’s spread joy with Christmas cards!”
Print the cards and the sign
Preparing the Christmas Card Activity:
- Print the Cards: Download and print the Christmas card designs from our website. Make sure to have enough for each family member to write several cards.
- Set Up the Card Writing Area: Choose a comfortable and spacious area in your home, like the dining room table, where the card-writing activity can take place.
- Position the Elf: Place your Elf near the stack of printed cards, perhaps with a pen in hand, as if it’s ready to start writing its own holiday messages.
- Display the Instructional Sign: Set up the sign next to the Elf and the printed cards. This will guide the family members to participate in the activity and think about their messages.
Engaging in the Activity:
- Invite each family member to select a Christmas card and think of someone special they’d like to send a message to.
- Provide pens, pencils, and additional decorations like stickers or glitter for personalizing the cards.
- Encourage thoughtful and heartfelt messages, discussing as a family the importance of expressing care and appreciation during the holidays.
Capture the Card-Writing Moments:
- Take photos of your family members writing their Christmas cards with the Elf as their festive companion.
- Share these moments on social media to showcase the joy and thoughtfulness of the holiday season.
This Christmas Card Writing activity with the Elf on the Shelf offers a meaningful way to connect with loved ones and spread holiday cheer. It’s a delightful opportunity for family members to express their feelings and send personalized wishes, making the holiday season even more special.
Day 20: Ludo Game Day with Elf on the Shelf

Roll the dice and move along in a fun-filled Ludo Game Day with our Elf on the Shelf! Your Elf has brought a printable Ludo game board, inviting everyone for a friendly and exciting game with a ‘Let’s Play’ sign.
Setting Up the Ludo Game Activity:
Materials Provided on the Website:
- Ludo Game Board Printable: A colorful and easy-to-follow Ludo game board.
- Instructional Sign: A sign that reads, “Let’s Play Ludo!”
Printable Ludo game and sign
Preparing the Ludo Game Activity:
- Print the Game Board: Download and print the Ludo game board from our website. Ensure the printout is clear and large enough for easy play.
- Set Up the Game Area: Choose a flat surface like a dining table or a spacious area on the floor where the game board can be laid out and easily accessed by all players.
- Position the Elf: Place your Elf near the game board, perhaps with a tiny dice or game piece, as if it’s ready to take its turn.
- Display the Instructional Sign: Set up the sign next to the Elf and the game board. This will invite the family to gather around and start the game.
Creating the Scene:
- The Elf appears eager and excited, setting the tone for a fun game day.
- The Ludo game board is prominently displayed, with spaces for each player’s pieces.
- The scene is inviting, encouraging immediate participation from the family.
Encouraging Family Bonding:
- Ludo is a great game for encouraging family bonding, strategy, and a bit of friendly competition.
- Celebrate each player’s progress and enjoy the ups and downs of the game together.
Capture the Game Day Fun:
- Take photos of your family playing Ludo with the Elf cheering them on.
- Share these moments on social media to showcase the fun and engaging activities you’re enjoying during the holiday season.
This Ludo Game Day with the Elf on the Shelf is a perfect way to bring the family together for some classic board game fun. It’s an engaging and entertaining activity that adds a playful element to your holiday festivities.
Day 21: Elf’s Day Off
Even Elves need a little rest! Today is ‘Elf’s Day Off,’ a special day where our beloved Elf takes a well-deserved break. With a sign declaring its day of relaxation, the Elf will be lounging peacefully, reminding us all to take a moment to unwind during the bustling holiday season.
- Printable: “Elf’s Day Off” sign.
Day 22: Connect the Dots Game Day with Elf on the Shelf

Connect, create, and discover with our Elf on the Shelf Connect the Dots Game Day! Your Elf has brought a pile of fun connect-the-dots puzzles for a day filled with drawing and coloring fun.
Setting Up the Connect the Dots Game:
Materials Provided on the Website:
- Connect the Dots Puzzles Printable: A variety of 12 engaging connect-the-dots puzzles with different levels of difficulty.
- Instructional Sign: A sign that reads, “Can you connect the dots and discover the pictures? Join me in this fun challenge!”
Print the connect the dots puzzles
Creating the Scene:
- Print the Puzzles: Download and print a selection of connect-the-dots puzzles from our website. Ensure there are enough puzzles with varying levels of complexity to cater to all ages.
- Set Up the Puzzle Area: Choose a spot in your home, like a table or a comfortable seating area, where the puzzles can be spread out for easy access.
- Position the Elf: Place your Elf next to the pile of connect-the-dots puzzles, perhaps holding a pencil or marker, as if it’s ready to start connecting dots itself.
- Display the Instructional Sign: Set up the sign next to the Elf and the puzzles. This will invite the family to engage in the activity and provide guidance on what to do.
Engaging in the Activity:
- Invite family members to choose a connect-the-dots puzzle and start connecting the dots to reveal the hidden picture.
- Provide pencils, markers, or crayons for completing the puzzles.
- For added fun, you can turn it into a friendly challenge to see who completes their puzzle first or who has the most creative coloring.
Encouraging Creativity and Discovery:
- Connect-the-dots puzzles are great for enhancing fine motor skills and encouraging creativity, especially in younger children.
- Once the puzzles are completed, you can display the finished pictures as part of your holiday decorations.
Capture the Concentrated Efforts:
- Take photos of your family members engaged in solving the puzzles with the Elf overseeing the process.
- Share these moments on social media to showcase the fun and educational aspect of your holiday activities.
This Connect the Dots Game Day with the Elf on the Shelf is a perfect blend of fun, learning, and holiday spirit, offering an engaging and creative activity for the whole family.
Day 23: Story Time Activity with Elf on the Shelf
Cozy up for a magical tale with our Elf on the Shelf Story Time activity! On Day 23, your Elf is found engrossed in a tiny printable book, inviting the children to join in for a delightful reading session.

Setting Up the Story Time Activity:
Materials Provided on the Website:
- Miniature Book or Story Printable: A printable miniture book that the Elf will hold.
- Instructional Sign: A sign that reads, “Let’s read together!”
Preparing the Story Time Activity:
- Print the Story: Download and print the miniature book or story from our website.
- Set Up the Reading Area: Choose a cozy spot in your home, like a comfortable corner in the living room or a child’s bedroom, where the story time can take place.
- Position the Elf: Place your Elf in a seated position with the miniature book open, as if it’s in the middle of reading the story.
- Display the Instructional Sign: Set up the sign next to the Elf and the book. This will invite the children to sit down and listen or read along with the Elf.
Engaging in the Activity:
- Invite the children to gather around the Elf and listen as you read the story aloud. Alternatively, if they are able readers, they can take turns reading the story to the Elf.
- Encourage discussion about the story. Ask questions about the characters, the plot, and what they think might happen next.
- Use this opportunity to instill a love for reading and storytelling in the children.
Capture the Story Time Moments:
- Take photos of the children engaged in story time with the Elf. These moments are perfect for creating lasting holiday memories.
- Share these reading moments on social media to showcase the joy and educational value of the activity.
This Story Time activity with the Elf on the Shelf is a wonderful way to foster a love for reading and to spend quality time together during the holiday season. It’s a peaceful and engaging activity that brings the magic of storytelling into your home, creating a special moment for children to connect with their Elf and the joy of reading.
Day 24: Goodbye Note
The Elf leaves a goodbye note, thanking the family for the wonderful time and reminding them of Santa’s imminent arrival.
Print a customized Elf on The Shelf goodbye note here.
When does Elf on the Shelf leave?
The Elf on the Shelf tradition typically concludes on Christmas Eve. On this night, the Elf returns to the North Pole with Santa Claus after his sleigh ride. This departure aligns with the end of the Christmas countdown and Santa’s completion of his worldwide gift-giving journey. The Elf’s departure signifies the end of its annual mission to watch over the children and report back to Santa each night. Families often mark this occasion with a goodbye letter or a special farewell scene, creating a meaningful end to the holiday season’s magical experience. The Elf then returns the following year to continue the cherished tradition.
 My name is